
- WOODEN.CITY 3D Clock Puzzle with Gears — top pick for teaching gear trains; high visibility, moderate cutting complexity.
- ROKR Cuckoo Clock Wooden Puzzle Kit — best value: showy motion with relatively straightforward cuts.
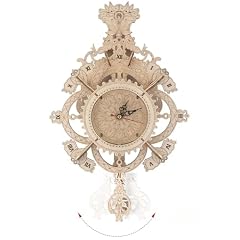
- 3D Wooden Puzzle Wall Clock with Pendulum — strong mid-tier: pendulum demonstrates timing concepts with moderate assembly time.
Quick Picks
Which kit to choose


Learning by making Hands-on learning that connects design, mechanics, and finish work
Why clock kits are great teaching tools
Laser-cut clock kits combine compact scope with rich learning pathways. They make abstract concepts — gear ratios, torque, and timekeeping — concrete because all moving parts are visible and tangible. Finished clocks also create natural motivation: a working artefact invites care, display, and storytelling.
What learners gain
- Mechanical literacy: gear trains, escapements, and pendulum dynamics explained through assembly.
- Design thinking: tolerance, fit, and aesthetic finishing when choosing materials and paints.
- Electronics and integration: basic motors, battery holders, and optional sensors in many kits.
- Troubleshooting: diagnosis skills improve when mechanisms are exposed rather than hidden.
Visible mechanisms accelerate learning because errors are easy to observe and iterate on; learners see how changing one gear affects the whole system. A completed clock becomes a usable exhibit that rewards maintenance and public critique.
Practical classroom tips
- Scaffold builds: assemble gear train first, then attach movement and hands.
- Encourage documentation: photos of each step speed repair and reflection.
- Reserve time for finishing and mounting — presentation matters as much as function.
Material trade-offs Match material traits to learning goals and shop flow
Acrylic vs. wood: which suits a makerspace clock kit?
Choosing between acrylic and wood shapes what a clock project teaches and how fast a makerspace can run kits. Both materials cut well on common lasers, but their behavior and post‑work differ in ways that matter for classes, prototyping, and display.
Performance and learning outcomes
- Wood: offers tactile finishing practice — sanding, edge chamfers, and staining teach surface preparation and patience. Plywood kits (like the Wooden.City and ROKR models) are forgiving for press fits and glue; grain and layering add character but require attention to orientation.
- Acrylic: excels at precision and visual clarity. Transparent or colored sheets highlight gearing and electronics, useful when the teaching goal is mechanism visibility or tight-tolerance parts.
Practical shop considerations
- Kerf and fit: measure kerf on scrap and compensate in CAD. Kerf from wood can appear larger because of charring; acrylic edges are usually glossy and dimensionally consistent. A simple calibration cut (two interlocking tabs) prevents surprises.
- Nesting and waste: nesting matters more with expensive acrylic; plywood often has knots and defects that require layout planning. Rotate parts and use tight nesting to maximize throughput.
- Settings and test cuts: avoid sharing exact numbers — instead, run a small matrix for each material and thickness. Track successful settings on a shop board so repeat runs are quick and predictable.
- Ventilation and safety: acrylic fumes and wood smoke/particulates both require exhaust and filtration. Use air assist, an extraction system, and respirators or masks when sanding.
- Sanding and finishing time: wood typically requires several finishing steps; acrylic needs minimal sanding but may benefit from flame or buff polishing and masking film to prevent scratches.
For makerspaces focused on hands‑on finishing and wood‑working skills, wooden kits align well. For demonstrations of mechanisms, rapid prototyping, or a clean modern aesthetic, acrylic often fits better.
Quick shop checklist
Test kerf on scrap and record the result. Mask acrylic before cutting; remove film after polishing. Use air assist + ventilation for all cuts. Pre‑sand or pre‑finish batches of wood parts to speed assembly.Evaluation emphasized mechanical clarity, laser time, parts completeness, and classroom fit.
A sample build checked fit, friction, and assembly sequence to reveal unclear steps and tolerance issues.
Ran movements for hours to reveal noise, wear, and timing drift; pendulum and escapement behavior noted.
Checked laser time, finishing needs, tool list, and repairability for classroom throughput.
Checklist
Buying checklist for makerspaces
- Movement type
Decide between quartz motors (low maintenance, quiet) and visible gear/escapement kits (high teaching value but more setup).
Look forClearly labeled movement type; accessible adjustment points.AvoidOpaque proprietary motors without specs. - Skill level & assembly time
Match kit complexity to participant skill and available sessions; multi-session builds should break into clear milestones.
Look forEstimated build time and stepwise instructions.AvoidSparse instructions or a single long assembly block. - Parts completeness & spares
Prefer kits that list every fastener and include spare teeth/pins or standard motor sizes to simplify repairs.
Look forFull parts list, included spares, common screw sizes.AvoidOne-off components that require special ordering. - Mod-ability & noise
Choose modular frames with room for electronics; inspect gear materials and backlash to estimate noise and upgrade potential.
Look forOpen designs, mounting holes for add-ons, low-friction gears.AvoidGlued assemblies or loud, high-backlash plastic gearboxes.
Featured pick
Top pick for hands‑on mechanical learning
01 Working gear train included
A 140-piece laser-cut birch plywood table clock that assembles without glue and exposes a working gear train and pendulum. Suited to makerspaces that prioritize visible mechanics and deep study of gear trains, escapement behavior, and troubleshooting over continuous, wall-mounted timekeeping.
- Working gear train and pendulum make mechanical principles visible
- 140 laser-cut pieces provide multi-step assembly and systems thinking
- Glue-free construction simplifies classroom builds and repairs
- Birch plywood feels durable and accepts sanding/stain for finishing
- Compact tabletop form factor fits workshop benches and demos
- Runs roughly ten minutes per wind — not intended for continuous timekeeping
- Requires sanding/sealing for best appearance and longevity
- Not plug-and-play with quartz movements; retrofit needs modification
- Wood tolerances can shift with humidity, affecting mesh and friction
WOODEN.CITY’s 3D Clock Puzzle stands out as a makerspace teaching tool because its real, visible gear train and winding escapement make cause‑and‑effect immediately apparent. The short run time and wooden construction steer it toward classroom demos and project-based learning rather than continuous use; light finishing improves both looks and tolerances. Retrofitting a quartz movement is feasible but requires careful modification. For programs focused on mechanical understanding, it offers rich, repairable learning opportunities.
Interactive cuckoo sound and lights
Best-value animated centerpiece for makerspaces — a large, silk‑printed wooden cuckoo with light and sound. Suits programs that prioritize visitor engagement and giftable finished pieces: assembly emphasizes spectacle over pure mechanical study, so groups get a display-ready object faster.
- Strong visitor engagement (chirp, moving cuckoo, lights)
- High perceived gift value; finished looks
- Large piece count but many pre‑printed parts save finishing time
- Dual power (Type‑C or batteries) for flexible deployment
- Good balance of visible mechanics and decorative detail
- Many small, fiddly wooden tabs and tiny parts
- Some press‑fit joints may need sanding, glue, or clamps
- Batteries not included; wiring and LEDs may require minor soldering
- Not optimized for precision timekeeping; occasional calibration needed
Versatile wall or desk display
A showpiece-grade mid-tier wooden puzzle clock that doubles as wall art and a tabletop conversation starter. Suited to makerspaces that want a satisfyingly mechanical build with visible gears and an educational pendulum—good for intermediate groups ready to practice assembly precision and finishing.
- Striking visual design that reads as decor and demonstration piece
- Includes pendulum for hands‑on lessons about timekeeping dynamics
- Dual wall/desk display increases installation flexibility
- Relatively approachable build for intermediate makers—no custom machining required
- Wooden puzzle fit can require sanding and patience during assembly
- Pendulum and escapement need careful calibration for reliable timekeeping
- Movement quality is mid‑tier; expect occasional tuning or part swaps
- Surface finishing and glue work add project time
Key tuning tasks:
Balance the escapement beat (adjust pallet alignment) so ticks are even. Set effective pendulum length for target rate; small changes matter. Isolate from drafts and vibration; mounting height and surface affect accuracy.Bring basic tools: small files/sandpaper, a strobe or timing app, mild adhesive for permanent joins, and spare bushings or a replacement movement if longevity is required.
- Glue-free assembly
- Clear illustrated guide
- Display-ready finish
- Shallow mechanical complexity
- Limited gear-train exposure
- Requires light sanding for polish
Next steps
Run a pilot build and scale
- Build one complete kit first and log parts, tools, and elapsed time.
- Assemble a spare‑parts kit (gears, shafts, bushings, extra movements) before the workshop.
- Pilot with a small group, capture finishing steps, then iterate with upgrades (RTC, 3D‑printed gears).
Recommended picks: WOODEN.CITY 3D Clock Puzzle is best for multi‑session mechanical teaching; ROKR Cuckoo Clock brings high engagement for outreach; the 3D Wooden Puzzle Wall Clock suits display and calibration practice; NIUNIUAMY and Adult 3D kits work well for short, low‑skill sessions.
Action plan: Do one test build, document missing parts and timing, run a small pilot (2–6 makers), stage a finishing station, and keep spares. After reliable runs, add electronics or custom gears as upgrade paths.