
Quick picks
Starter replacement movements


Movement types Match replacement to the drive mechanism and features
Movement types and how they drive the hands
Clock movements fall into three practical groups: battery quartz, electric (mains-powered), and mechanical (mainspring, weight-driven, pendulum/chiming). For a deeper primer on internal operation, consult how clock movements work.
- Battery quartz: a tiny quartz oscillator runs a stepper or sweep motor that turns gears. Shaft height, pinion size, and whether the second hand steps or sweeps determine compatibility. Quartz swaps are usually straightforward if the shaft profile and hand weight match.
- Electric (AC synchronous): an AC synchronous motor keeps time directly from mains frequency. These require matching voltage, mounting and dial/arbor layout; substituting with quartz often needs mechanical adaptors or a conversion kit.
- Mechanical (pendulum/weight/chiming): power comes from a mainspring or weights; an escapement (often pendulum-regulated) meters release. Chiming and striking use additional trains and arbors—replacements must replicate plate spacing, arbor count, and gearing strength to handle heavy hands and hammer actions.
Quick checklist: match power type, shaft dimensions, arbor count for chimes, and hand weight capacity before buying.
Removal & Documentation
Remove the movement and document for replacement
- Power off and prepare workspace
Remove batteries and unplug any power; work on a flat, well-lit surface with a soft cloth to protect the dial and hands.
- Photograph the clock intact
Take clear photos of the front, side and rear of the assembled clock and include a ruler or coin for scale.
- Remove hands and preserve order
Carefully lift hour, minute, and second hands straight off with a hand puller or padded pliers, photographing each step and stacking hands in original order.
- Open case and extract the movement
Unscrew or unclip the bezel and mounting hardware, note movement orientation and slide the movement out while photographing the front, back, and mounting points.
- Label parts and record measurements
Measure shaft lengths and diameters, note shaft style and battery type, place screws and small parts in labeled bags and attach corresponding photos and short written notes.
Essential shots to capture:
Front and rear of the movement, close-up of any stamped numbers or logos. Macro of the shaft(s) showing length and profile, with a ruler for scale. Mounting tabs and screw locations (orientation matters). Hand-stack order and any spacers or washers. Battery size/type and any corrosion.Keep images named or numbered to match labeled parts bags for quick reference when ordering or consulting an expert.
Essential data Prioritized dimensions and reproducible techniques
Measurements to collect first
Priority measurements (in order)
- Shaft length past the dial: measure from the dial surface to the shaft tip (record mm and in).
- Shaft diameter and style: record diameter to 0.1 mm with note if threaded, tapered, or tapered with nut.
- Dial hole diameter: inside edge to inside edge; needed for fit and washer use.
- Movement depth (thickness): from front mounting plate to back plate.
- Mounting hole spacing and size: center-to-center distance and hole diameters.
- Hand lengths: measure from center pin to tip for minute and hour hands.
Practical tips: use a digital caliper for repeatable accuracy, photograph each measurement with a ruler in the frame, note units and take each measurement twice. For guidance on layout and hole spacing, consult measuring the dial and mounting holes.
Measure precisely Exposed vs full length, threads, diameters, and precise measuring
Shaft and spindle specifics
A movement’s shaft (spindle) must match the dial and hands precisely. Exposed length is the distance from the dial surface to the tip of the shaft; full length includes the portion recessed into the movement body. Shafts may be threaded (accept nuts and washers) or smooth (hands press-fit); some are stepped with different diameters along the length.
How to measure accurately
- Use digital calipers to record: exposed length, full length (from movement flange), and diameters at each step. Measure to 0.1 mm if possible.
- Note thread type (coarse/fine) and thread length; photograph with a scale.
- Refer to shaft length considerations for hand clearance guidance.
Mounting basics How the original hands limit movement choices
Hand-mounting systems and constraints
Clock hands attach to movements in a few predictable ways; the attachment type usually dictates whether adapters or replacement hands are needed. First, consult the section to identify your hand mounting type so the right solution is chosen.
Common systems:
- Friction (press-fit): hands press onto a smooth or slightly tapered cannon pinion and stay by friction. These require a matching shaft diameter and hub depth.
- Tapered cone: the hand hub is conical and seats on a tapered shaft — often interchangeable with tapered adapters when sizes differ.
- Nut-mounted: the minute hand is held by a threaded shaft and a securing nut; the nut size and thread type must match the movement.
- Center-post (second pin): a thin, separate post carries the seconds hand; its pin diameter and length must align exactly.
If the original hand hubs don’t match the replacement movement, options are to fit a sleeve or adapter, swap to compatible hands, or choose a movement with the same mounting style. Measure hub inner diameters, hole depth, and post diameters; heavier hands may also require a higher‑torque movement.
Hand fit check Practical checks before forcing a fit
Measure hand holes and decide whether to adapt or replace
Start by removing the hands and measuring each mounting hole with calipers. Record the inner diameter of the hour, minute and seconds holes to 0.1 mm (or nearest 0.01 inch), and note the hand-mount type (friction, tapered, splined, square). Compare those numbers to the movement shaft dimensions and the movement’s threaded/smooth portion.
Quick checklist
- Remove hands gently and note their stack order.
- Measure inner hole diameters, shaft diameter where the hand rides, and panel thickness.
- Photograph the hands on a ruler for reference.
If a small clearance mismatch exists, an adapter sleeve can salvage a favorite hand; if the mounting type is incompatible or holes are ragged, replacement hands are simpler and safer than forcing a fit. Start by checking the matching hole size for replacement hands against any kit specs before buying.
Long-spindle DIY replacement set
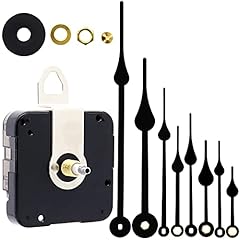
Includes movement and multiple hands. Long spindle total length 18 mm, thread length 5 mm; fits panel thickness about 1–3 mm. Comes with two hour and two minute metal hands, mounting hardware, and instructions. Suited for large or thicker clock faces; verify shaft and hole measurements before ordering.
Decision guide Practical signals and tradeoffs
Swap, repair, or convert: choosing the right path
Decision depends on the clock’s value, visible signals, and the desired outcome (accuracy versus authenticity).
- Quartz swap: sensible when the clock is low‑value, lacks a pendulum, has an unbranded movement, and hands fit replacements. Pros: low cost and high accuracy. Cons: loss of the original mechanism and reduced collectible appeal.
- Repair: pursue when the movement is mechanical, shows maker marks, includes a pendulum or chime, or the clock is rare. Pros: preserves value and original sound. Cons: can be costly and may require a specialist.
- Full conversion: appropriate if parts are unobtainable or the original is irreparable and keeping the dial/hands matters. Prefer reversible or sympathetic conversions.
Photograph maker marks and compare before deciding; for matching guidance consult the what clock movement is needed.
Document before altering. Photograph maker marks, serials, and the movement from several angles — that record often guides a better decision.
Buying checklist
Prioritized compatibility checklist
- Spindle (shaft) length and diameter
Confirm exposed shaft total length, threaded length, and diameter against measured dial thickness and hand-fit measurements. Mismatched length or shaft type (I, II, etc.) is the most common incompatibility.
Look forExact total and thread lengths matching the dial and hand seatAvoidGuessing size or relying on nominal names alone - Mounting style and movement depth
Match the movement’s mounting plate, hook or keyhole pattern and the movement body depth to the case/backing so the movement sits flat and hands clear the dial. Some clocks need plate adapters or spacer washers.
Look forSame mounting footprint and sufficient body clearanceAvoidAssuming any movement will fit thin or deep cases - Power source and chiming/strike functions
Verify battery size and whether the movement supports chiming, hourly strike, or auxiliary contacts for separate chime mechanisms. Replacing a chiming mechanical or AC movement with a simple quartz will lose those functions.
Look forExplicit chiming/strike support or contact terminalsAvoidReplacing specialized drives with basic battery-only units - Torque, hand weight and noise characteristics
Choose a high-torque movement for heavy or long hands and check whether the drive is sweeping or ticking. For quiet rooms, consider quiet movement options and confirm torque specs so hands don’t drag.
Look forHigh-torque rating and stated hand-length capacityAvoidLow-torque movements with heavy or oversized hands
Good for large or thick dials
Long 18.5 mm total spindle (8 mm thread); I-shaft, high-torque quartz drive that supports long hands (10–450 mm). Includes two sets of hour/minute hands, metal hook and mounting hardware for DIY repair. Suited to 4–8 mm panel thickness; battery powered. Widely sold as an economical replacement for oversized wall clocks.
Conversion options When conversion makes sense, what adapters are needed, and trade-offs to expect
Convert-to-quartz kits and alternatives
Converting a mechanical movement to quartz is often the least-risk choice when the original movement is missing parts, repair costs exceed value, or long-term low maintenance and accuracy are priorities. Conversion is practical for everyday mantle and wall clocks that lack collector value.
Common adapters and fit issues:
- Shaft adapters and spacers: compensate for wrong shaft length or diameter; measure exposed and full shaft dimensions first.
- Hand-hole adapters or replacement hands: match the hand-mount system (arbor size and press fit).
- Mounting brackets or plates: secure a non-drop-in quartz unit to original case.
What is gained and lost:
- Gains: reliable battery operation, improved accuracy, often silent sweep operation and lower maintenance.
- Losses: original mechanical action, authentic chiming or pendulum-driven behavior (chimes often require separate modules).
For available options, compare the convert to quartz kits that fit and verify shaft length and hand compatibility before ordering.
Grandfather clocks Mounting, suspension, and when professional repair is appropriate
Longcase (grandfather) and chiming special-fit considerations
Grandfather (longcase) and chiming clocks often require bespoke movement fitments because of larger plates, multiple trains, heavy hands, and unique suspension arrangements. Confirm that any replacement handles torque and plate‑to‑dial spacing.
Common incompatibilities include:
- short or exposed-shaft replacements that won’t reach the dial
- dial-mount vs backplate mounting differences
- pendulum leader length and suspension-spring width mismatches
- chiming train offsets, wrong hammer spacing, or missing fly governor
- single-motor quartz chime modules that cannot drive separate strike trains
For off-the-shelf options, verify a chiming movement fit for longcase clocks matches mounting and suspension. If the movement is original, rare, or has worn pivots, or the chiming pattern is complex, seek a specialist locksmith/horologist to avoid irreversible damage.
Hire a pro when originality, complex chiming trains, or worn pivots are present.
Antique or maker-signed movements — preserve provenance and value. Multiple-train chiming/striking — requires correct train alignment and timing. Visible wear or hard-to-reach mounts — improper replacement can cause permanent damage.Verify listings and bench-test the movement
Before installation, verify seller claims and perform simple bench tests to avoid returns. Focus inspections on shaft specs, mounting footprint, power/chime compatibility, and close-up photos of the movement’s front, back, and dial hole.
- What to read in specs and photos
Confirm shaft length, diameter, thread and hand-mount type; note movement depth, battery type, chime outputs, maker marks, visible pivot wear.
- Questions to ask the seller
Request ruler‑scaled photos, measured shaft/thread dimensions, a short video of the movement running, and the seller’s return or test-run policy.
- Short bench tests on arrival
Fit fresh battery, run movement without hands to check wobble and noise, verify chimes/triggers, time rate over ten minutes, and test torque with the hour and minute hands.
Methodology: recommendations come from practical teardown, caliper measurements, seller-image cross-checks, and bench-testing movements under real loads.
Quick Q&A
Common pre-order questions
What shaft/mount tolerances are acceptable?
Aim for 0.1–0.3 mm clearance so hands rotate freely without wobble. Small mismatches can be fixed with thin washers or pressed bushings.
What about returns and testing?
Prefer sellers with explicit return windows. Bench-test the movement 24–48 hours under expected load and save photos and original packaging for claims.
Which batteries work?
Match cell size and nominal voltage—AA/AAA/button as listed. Use the recommended chemistry; incorrect types can alter timekeeping or damage circuitry.
How noisy will it be?
Sweep quartz and movements labeled ‘silent’ are quiet; mechanical and chiming units generate obvious clicks. Isolate with rubber grommets and secure mounting to reduce resonance.
Are adapters readily available?
Yes—brass collets, plastic reducers and threaded bushings cover most mismatches. For unusual sizes, custom-machined or 3D-printed adapters are common solutions.
Final checklist
Purchase-and-install checklist
- Photograph dial, movement (front/back), hands, and labels with a ruler for scale
- Record exposed/full shaft lengths, diameters, thread sizes, and movement depth
- Note hand-mount type, hand-hole diameters, and relative hand weights/clearance needs (hour/minute/second)
Quick step-by-step: Document everything with clear photos and notes (movement label, battery contacts, hand positions) and prioritize measurements: exposed shaft, full shaft, shaft diameters, thread size, dial hole, and movement depth. Decide route: direct replacement when shaft and mount match; adapter when mount differs but torque is sufficient; conversion to quartz when heritage or chiming fidelity is not required.
Bench-test and preserve originals: Mount the candidate movement on a temporary dial/jig, fit the original hands, and run it on battery for 24–48 hours to verify clearance, torque, timing, and chime sequence. Bag and label all removed parts, fasteners, and spacers; keep photographs of the original assembly. Only complete final installation after a successful bench-test and confirmed fit.